11 December 2018

Santa Wall Hanging

My Santa wall hanging is now mostly quilted thanks to a day off due to snow! It's quilted enough to be bound. So I dug around in my Christmas fabrics and found the fabric for binding. It's not cut yet but that will be tonight.

I am expecting a ton of company when my brother and sister-in-law from California come for a visit on the 19th. A bunch of cousins are coming over.

SO... cleaning is happening at my house. My living room is a wreck since it is also my quilting studio. So fabrics are being sorted and put away.

I removed everything from the mantle and dusted and oiled the wood, washed the nick nacks, and put only _some_ of them back once they were dry. I found a lot of dead insects, yuk!

Time to get the Christmas decorations out and up!

My Santa is going to be hung up in the kitchen next to a small Christmas tree of Mom's that I found in _her_ Christmas stuff. I quilted it with gold metallic thread and I think it looks great.

Time to take a picture.

Snow Pic!

Getting really deep!
We ended up getting more than a foot of snow. Yeah. Really.

19 November 2018

Deer Panel Quilt top pics!

So my Deer Panel quilt top is A TOP! and I got pictures of it this weekend.

Deer Panel Quilt Top
Now to get this thing quilted. YIKES! It's big. 82 x 86 inches.

13 November 2018

A new top!

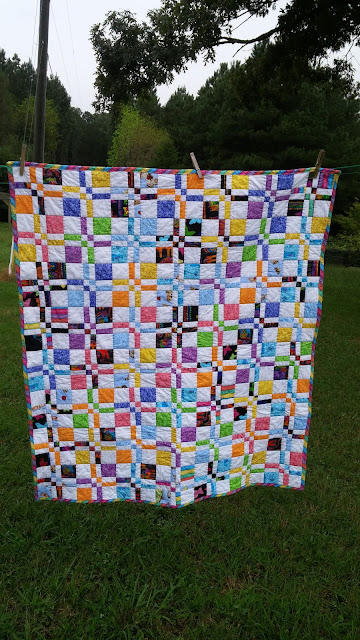
I have finished the baby I-Spy to top stage and also created a pieced back for it this weekend.

I had to resort to taking a picture on the ground as it was way too windy!

50 inches square.

On the Ground

Windy picture

I got the borders on my Deer panel top also and that's also in its final size of 82x86 but it was raining out all yesterday so no picture of that one.  <sad face>

11 October 2018

A new finish - two in one week!

I have a new finish, a Baby Streak of Lightning, and an old finish that I had never taken a photo of. Oops!

My new finish came from a UFO of Mom's that I found. She had started a log cabin baby quilt in QAYG-style. She had only done one round around the center yellow square. Many, many strips were all cut selvage to selvage. The batting was cut, as well as the backing.

So I finished the squares. Quilted them each and then joined them in the quilt-as-you-go style I use (the one Sharon Pederson shows in her books).

I free-motion-quilted the blue fabrics and I think they turned out quite uniform even though each was done separately.

Front view - Baby Streak of Lightning

Showing a peek of the back


Back View - Baby Streak of Lightning

So I finished this one in May 2018 but forgot to take a picture so here it is! This is handquilted, which I don't do a lot of.


10 October 2018

A completion

Well, I decided Sunday night we needed new hot mitts. Ours were just terrible. So I finished one Sunday night and one Monday morning before work. I'm happy!

2 new hot mitts!

Showing the back and loop

01 October 2018

2 more new starts - o boy!

I have made a bunch of the blocks for the deer panel. Now I am struggling with adding a small border to fit the block sizes. I am stuck trying to figure out my zipper foot for this machine. I've never used that foot on this machine since I used it for quilting primarily.

I am adding two strands of black yarn to an inch width of fabric to create a ridge on the side of the panel and so I want to use the zipper foot to get right up next to the ridge. I think I am going to have to resort to YouTube.

I am going to the AQS Quilt show in Virginia Beach on Wednesday. Maybe I'll just visit a Janome vendor and get them to show me how to change the needle positions when using the E foot. LOL

I should have taken some pictures of the blocks. They are really turning out nicely and they are quickly building up the size of the quilt. I am also considering making a second quilt with the same fabrics as I still have a ton of this fabric.

So the new starts. I finally figured out what I am going to do with several hundred 5-inch squares I found in my mother's stash. I am adding 1.5 inch strips on all sides and 1.5 inch cornerstones. So I have a dark 5-inch square, then I used 4 matching light-colored 1.5"x5" strips and 4 matching _dark_ 1.5-inch cornerstones to make a square. If the 5-inch square is light, then the strips are dark and the cornerstones are light. This results in a 7-inch square which will be 6.5" finished. I'm liking it.

I will alternate light and dark with no sashing. See picture below.

Viewing a sample layout


It will take a while to get enough to make a quilt, but I'm ok with that. I finshed 9 blocks this weekend.

My 2nd new start is one of Bonnie Hunter's patterns from one of her books. It uses blue and white fabric. Made with two four-patches and two half square triangles. I had way too many blue strips left over from the baby quilt that was in Mom's UFOs.

I have finished quilting all 12 squares and have cut them to square them up at 10.75 inches. They look great! I brought them to work to view my layout on the big conference table.

Laying it out
They were just filing in and I barely got a picture of it. What a mess!

26 September 2018

A New Start

All 12 blocks of the baby quilt are now quilted. I experimented with free-motion-quilting by button, i.e. I have a stop-start button on my machine and have never really used it. Takes some getting used to, but it's ok.

Mom left a generous amount of fabric around each block and I need to cut them all to the same size. I guess she was going to do a different sort of QAYG method than what I use.

So to do that, I needed to clear my cutting table. It's gotten a little stacked up. But, at the same time, my quilting group is starting to create quilts for the North Carolina Relief effort so OK I made a new start.

I found this very large deer panel in Mom's stash and she had also bought a lot of coordinating fabrics. And I mean, A LOT! Probably enough for two or more quilts. Golly!

After messing around (wasting time) designing in EQ8, I decided I am going to make a bricks-and-stepping-stones design around it (from Bonnie Hunter's free patterns) but mostly above and below it after framing the print with extra fabric so the blocks will fall correctly.

 I do really like this panel.


So I guess I need to name the baby quilt since it is almost a top. I think it's going to be "Baby Streak of Lightning QAYG."That's a mouthful!

The other one will be "Bricks and Stepping Stones with Deer." Hah! I am considering doing this one as QAYG also since the center is so very large.

I guess I now need to add them to my list of projects and count them up.

18 September 2018

Free-Motion in Progress

So I have now finished walking-foot quilting all of the light halves of my 12 blocks. I started free-motion quilting the blue halves and I've gotten two done so far.

I really like how they are looking!

So I've added my pictures in huge size so you can check out the quilting! And also so I can look at them while I'm at work! <wink>

I used a beautiful yellow Isacord and a lovely Ricky Tims pale blue from Superior Threads.

Block 1

Block 2
I'm calling my walking-foot quilting "organic." I didn't mark and just eye-balled each line. Think Gees Bend.

12 September 2018

Mom's UFOs

Well, digging in Mom's stash is bringing her UFOs to the forefront.

I needed some mindless sewing over the weekend so I started working on a QAYG baby quilt. She had cut out all the strips selvage to selvage, all the batting squares and all of the backing. Easy.

As of Monday morning I had the squares finished, pin-basted and two of the squares half quilted.


Unquilted Stack and the back of one showing
 I just walking-foot quilted without marking and without trying to be too OCD about perfectly straight quilting. Looks cool!
Two squares half quilted
I'm planning on doing free-motion quilting on the other half with purple thread and swirls. But that requires re-threading so I will do all the walking-foot stuff first and come back and do the free-motion stuff later.

I guess I need to add this UFO to MY list now.

This morning I got four more quilted so I'm half done with the walking foot stuff. YAY!

10 September 2018

A Finish (x2)

I have two finishes and finally got a couple of pictures to prove it.

My 5-inch D4P (disappearing four-patch) baby quilt is DONE! I conquered the bias binding so I could get the stripe like I wanted it. It looks like a stick of juicy fruit gum!

I recently taught a class on QAYG (Quilt As You Go) at my quilting group and made this little table runner to teach the technique.
Side 1


Side 2

It was funny. I was looking up a pattern for someone else in the group and found an article by my favorite author of QAYG techniques in the exact same magazine.

The article was found in Quiltmaker July/August 2003, No. 92, beginning on page 58. The article was called "Turning the Tables" by Sharon Pederson.

So I made the runner along with my students to show the techiques. There are three full 10-inch blocks and four triangles to create it. A 14-inch square of batting cut diagonally twice creates the fill-in triangles of batting. So it can be done with scraps of batting. It would also make a nice present in a hurry.

On another note, I planted moon flower this year for the first time and I REALLY love them. They look really interesting before they bloom, like a unicorn horn.

They also have a very lovely scent.


I will be replanting them every year!

They also bloom all day on rainy days.

Because I also decided that I needed to do some easy piecing, I picked another of Mom's UFO and started sewing.

The project was a log cabin baby quilt with 12 centers created with one round of fabric, light and dark, about 4.5 inches square.

All of the blue strips in various different patterns were cut, width of fabric and all of the light colored fabric (one kind) were also cut, width of fabric. So as I went, I cut them to size for the next round. Also lots of ironing.

Nice mindless work.

I ended up finishing all 12 blocks, then layered them and pin-basted them. Got two of the light halves of two blocks quilted with my walking foot. Unfortunately, I didn't manage to take any pictures this morning. Must do that tonight.

04 June 2018

A new start

yes, yes, I know. Must work on my UFOs. But this was such a FUN block from Bonnie Hunter! <whine>
BH Diamond Tile Block
Isn't that just FUN!?!


20 February 2018

Making Selvage Edge Blocks

So I sat down and decided to show how I am making my blocks.

 Here is my intial set up with my 2.5 inch black strip going down the middle and two selvage strips on either side, prior to cutting the strips.

First pinnning the strips on the underlayment

Next, I flip the block over and generously trim the excess.

Trimming the excess prior to sewing
 Then trim the other end.
Trimming the opposite end

Time to sew.
Sewing the first selvage strip down
 I flip the block around and sew the second strip down.

Sewing the second selvage strip down
 Time to add more strips.

Adding more strips to the block
Next flip the block over and trim the excess fabric before sewing.
Trimming up yet again

Trimming the other side

Sew down the new strips.

Sewing the next strip

Sewing the other strip
Keep going until you fill up the block.

Easy peasy!


14 February 2018

Along the Selvage Edge

Currently I am making some 10.5 inch blocks with a fabric underlayment, with 2.5 inch black strip crosswise across the block and then selvage edge strips on both sides of the black until the square is filled. I whipped up over 50+ of these almost before I realized it.

Wow! So much fun.

Must take some pictures of those.

Now, however, I need to trim all of those 50+ blocks. BORING! 

From now on, I will trim them as I make them. Yowser....

I started creating the blocks for the reverse side as I am going to make these up in a Quilt-As-You-Go style with the selvage edge blocks. 

I am using a modified version of the Moda BakeShop pattern Labyrinth. I say modified because I need a bigger initial block.

Since my other blocks are 10.5 inches, I need an initial block size of 11 inches prior to cutting them in half and sewing them back together. So I used two 3.5 inch strips, one 3 inch strip (in the middle), and two 1.5 inch white strips to make the initial block.

The BakeShop instructions tell you to cut the blocks in different directions but NO. If you put two squares right sides together and do the cut, then they are cut correctly AND the sets of triangles are already paired for sewing together. 

A much better way to do it!

I am going completely scrappy for the labryrinth squares also. So much fun!

Photos will be coming soon!

30 January 2018

More placemats!

This weekend I finished four quilted placemats and yesterday during my day-at-home sick day, I completely made two more! Whoo Hoo!

I just love the backing.

Fun backing!
 I just looked up my order from fabric dot com and I purchased this fabric in 2009! O my.

Color blocks - so fun!
I found several hundred five-inch blocks in the boxes of fabric my mother gave me. I still have not made a dent!

And the reverse side

One closeup
I just love all of the different patterns in these squares!

23 January 2018

Resigning as UFO Queen

My reign as the Stashbuster Queen of the UFOs has come to an end as I have officially sent the notice that I completed the baby quilt. It is 41 x 47 inches and used 3.7 yards of fabric.

Yay!

Nice and wrinkly from being washed

Sticking to my design wall
I can't believe how the entire quilt stuck to the design wall. I would have thought it would have been too heavy.

22 January 2018

A Finish and a new Featherweight!

I was fairly productive since my last post, in spite of having two grandsons running around the house for two days.

I layered and quilted two place mats (out of four). Need to cut the batting for the other two. The tops and backs are cut and waiting.

I bound my 5-inch D4P baby quilt and got it washed and dried by Sunday. I need to take a picture and measure it to determine my yardage used. Then it will be a totally official finish!

I cut out around 10 10.5-inch batting squares from scraps that were donated from my quilting group. One of the longarmers in the group had leftover batting after cutting it off of completed quilts. I guess she didn't want to just throw it away but she wasn't going to use it. YAY! I took it all since no one else wanted it.

I missed my quilting group this weekend but I had two grandsons with me for a sleep over. A very good reason to miss it.

DH made a lovely turkey for Saturday night dinner. My Mom was also with us so the table was very full. The house smelled so yummy all day!

On top of everything else, someone email me from a craigslist posting, a month after I sent my query about a sewing machine. ONE MONTH!

That began a two-day messaging session (off and on). He had taken the post down so I kept asking for better pictures. In the end, I ran out on Sunday at 12:30 pm and got another gorgeous Featherweight machine for $180!!!

It was in tip-top shape, case and all, even if it is a bit dirty. Even the case was in just about perfect condition! Cord was also excellent.

Just look at those decals!!

Lovely decals even it's a bit dirty


Even the manual!


Look at all those feet!

Even the insert and 5 bobbins

Serial number AH439168 - 1948

17 January 2018

What's In The (Muffin-Topped) Box?

So I was going to explore a box full of fabrics that has been sitting in my bedroom, the result of "box cleaning."

It is very muffin-topped! Also a shot of one of my 301a's.
Lovely over-full box.
So last night DH and I went out to dinner so I did not really have enough time to do a full investigation of this box. I did check out a few layers.

Some upholstery samples.
 The upholstery samples came from some boxes of my Mom's. Not sure what I am going to do with them.

Quilting samples and 1 Sashiko block from the 2017 MAQF 

Still overflowing
Well, that did not remove much from the box. Humm....


Supplies for making fidgit quilts

Supplies for Sashiko blocks and some gifted bubble fabric

Still no dent!

Love this fabric! 
The pansy fabric is part of one of my UFOs that I am hand-quilting because my free-motion quilting is still not very good at all.

Ok. Now there's a little dent!

Fabrics that need ironing
 Ok, so these need ironing and sticking in my stash.

Yikes. Not much of a dent either!
 So, I am going to have to continue the exploration of the box tomorrow night, after I iron the uncovered fabrics.

So here is a view of my stash that I can see while sitting at my computer...

Fabrics behind my computer

Fabrics to the right of my computer
Ok, that last picture is pretty bad. I will re-do it tonight.

My sewing machine sits in front of my computer so if I sit down at the computer, I must sew at least one thing! JOT - Just One Thing!